Thursday, February 12, 2015

Warby Parker -- 5 Years and Lots to Celebrate!!

I was thrilled when Warby Parker asked me if I'd be interested in covering its newly released Half Decade collection!! Although I don't wear glasses myself, my husband is a Warby Parker customer and he and I were both involved in the selection process of his glasses. It took us two at-home try-on boxes to get it right, but the process is so simple and user-friendly that we didn't mind the wait. So, it's no wonder that Warby Parker has observed great success over the past five years!


To start the party, Warby Parker employees hosted the "Biggest Smallest Parade Ever" in Manhattan. I hear it was awesome - you can check out some of the fun surprises here. At the event were David Gilboa, Neil Blumenthal, and Jeffrey Raider - three of the company's founders.

Side note - I met Jeff last November at the McComb's Marketing Conference. He was rocking the Movember stache, naturally...


But onto the exciting stuff... WP is launching a new collection today to celebrate its five year anniversary, and my favorite thing about it? The monocle, of course!

Pop Art Monocle!

The entire Half-Decade Collection includes a re-release of five and a half (ha, monocle!) designs from Warby Parker's first-ever collection, all featured in a limited-edition spectrum of its signature hue, blue. I do have to say, if I wore glasses, I'd be instantly attracted to blue frames. Wearing just a blue shirt makes my blue eyes pop, I can only imagine what blue glasses would do!

In the parade photo above, you can see David Gilboa wearing the new Fillmore, Neil Blumenthal in the Huxley, and I believe that Jeff is in his usual glasses, though the frames seem reminiscent of the Roosevelt, without the lighter bottom half on the frame. You can check out the entire collection on the prescription eyeglasses page!

So, congrats to Warby Parker on its five years of success! I'm loving your new collection and I have no doubt that others will too. Cheers!


Saturday, December 13, 2014

Cronuts, Day 2

And the adventure continues...

Day number two is not a big time commitment. The work involves combining the butter block and the dough. This day is integral to the light, flaky layers within the cronut.


The first 20x20 square I rolled out was not quite a square. But the second 20x20 square I rolled out was a bit more successful. The difference was the placement of the rolling pin. On the second square, I made sure that the rolling pin always overlapped the edge of the dough. (Does this make sense?) Previously when I rolled the dough there was about one inch of dough outside the end of the rolling pin, that led to edges that were not straight. The second time I made sure the rolling pin was outside the edge of dough which helped maintain the square shape. I made an infographic, below, to illustrate what I'm talking about.


Thursday, December 11, 2014

Cronuts, Day 1

'Tis the season for cronut-making adventures! Once I learned the recipe was published, I knew this would be an activity I undertook at the start of my winter break. Especially since my attempt to buy a cronut at Dominique Ansel Bakery this past summer was a "failure". And, I put that in quotes because although they were sold out of cronuts, the bakery recommended the DKA which blew my mind!

The first day of making cronuts is not overwhelming, at all. Throughout the process, I referenced Dominique Ansel's recipe published on the ABC News website. It's really important to read the recipe thoroughly, multiple times, before starting the process because it is a very detailed process/commitment.

A photo posted by Caitlin (@cavdodd) on


The first day involves creating the dough and shaping the butter block. I recorded part of the process in my video feature below!!


I also made the ganache for my cronuts. I opted to go for the Champagne-Chocolate ganache & glaze, with the orange-sugar for rolling.  I chose this as the ganache because it was the only one that did not have gelatin in the recipe. Not that I'm opposed to gelatin, but how do you say no to Champagne?!

A photo posted by Caitlin (@cavdodd) on
Have you made cronuts? Or, have you had an infamous cronut?! I'd love to know what you thought... please leave your comments below.

Sunday, December 7, 2014

Bucatini All'Amatriciana

I love this recipe! I first had it on my first night in Rome at the start of my semester abroad in college. The pasta and sauce were homemade, so this recipes requires some commitment as it takes a bit of time to complete!

I got my pasta recipe from the KitchenAid pasta press manual. Jump to page 10 for the Basic Egg Noodle Pasta. I actually make this recipe in my Cuisinart food processor instead of in my KitchenAid mixer.

  1. Put 3 1/2 cups of sifted flour in the food processor, add 1 tsp salt, pulse to combine.
  2. Crack four large eggs into a measuring cup. Turn on your food processor and add the eggs. 
  3. If the dough does not form into a ball slowly add in cold water, maximum 1 TBSP, until the dough collects into a ball on one side of the food processor.
  4. From here, knead the dough for about 30 seconds and pull out walnut-sized pieces of dough to drop into the pasta press. 
  5. Follow instructions and guidance from the manual, in regards to speed, etc.
I made a video of making the pasta! It is fairly long, so if you don't have time to watch it all, here are a few tips from it:


  • King Arthur Flour is the best, because Dave's grandma says so :)
  • If you make your dough in the food processor, make sure you have the dough blade attached
  • "Sifted flour" is different "flour sifted". The first wants you to sift (or add air to) the flour and catch the flour below the sifter/strainer in your measuring cup. The latter, flour sifted, wants you to measure out the amount of flour then sift it to separate and add air to the flour.
  • Quick math lesson: 7/8 is halfway between 3/4 cup and 1 cup. (You need to know this when determining if you have enough eggs!)
  • Place a wet paper towel underneath your cutting board to prevent the board from sliding across your countertops! 

The Amatriciana sauce is so tasty and so simple. I hope that you enjoy it as much as I do!
  1. Small chop 2 yellow onions
  2. Dice 1/2 pound of pancetta in strips. I like to ask the deli counter to slice the pancetta about 1/4" thick.
  3. Heat a dutch oven, or something similar with a heavy bottom, over low-medium with some EVOO in the bottom. Add in the pancetta and cook until it's toasty and brown.
  4. Add in the onions and continue cooking until onions turn translucent
  5. Pour in two 28 ounce cans of whole Italian San Marzano tomatoes. As these cook the tomatoes get soft and I like to go after everything with a potato masher to break up the tomatoes.
  6. Bring to a boil and then drop it to a simmer for at least one hour... the longer the better! Season with salt and adjust as you go along.
To finish your pasta in the sauce, pull out 3-4 ladles of sauce and set aside. Remove the pasta from salted boiling water one minute early and add it to the pan of sauce. Add in 1/2 cup of grated parmigiano-reggiano and a swirl of EVOO, then stir to combine. Add any remaining sauce, as needed. 

Mangia and enjoy!!

Thursday, December 4, 2014

Thanksgiving, in Review

Ross and I had a lovely Thanksgiving! In addition to spending quality time with loved ones, stuffing ourselves with delicious food, and enjoying a few games of Cards Against Humanity, we got to enjoy a cider tasting from one of our favorite cideries (is that even a word?), Albemarle Cider Works!


We had the whole lot from Albemarle. It's hard to believe that just one year ago they only had four assortments. I'd like to point out that if you're thinking of Woodchuck or Strongbow in this post then you are quite misguided! This hard cider is tart and sparkly. It is not nearly as sweet as the mass distributed options you've seen around. 

Complete with tasting guide!
Ross and I first tasted Albemarle Cider Works two (or was it three) years ago. We loved the unique flavor of these ciders. At the time our favorite was the Royal Pippin. Now, in the broader spectrum of ciders produced, we thought that the Royal Pippin was not as flavorful as some of the others, such as the Ragged Mountain - a group favorite this Thanksgiving!

A cidery (I'm going to make this word happen!) recently opened in Austin. Ross and I are excited to try it out. Austin Eastciders looks promising and really caught my attention - especially given that it markets its product as "bittersweet" and "lightly carbonated". I'm quite intrigued and look forward to trying some soon.
In addition to my post as sous chef and cider taster at Thanksgiving, I was given the task of folding the linen napkins. I try to take this opportunity to be really creative! So, some research and I settled on a combination of the "Rosebud Napkin Fold" and "Crown Fold" courtesy of NapkinFoldingGuide.com. Didn't they come out super cute?!


Tuesday, December 2, 2014

Top Knots and Fur Vests

Today I wore an outfit that was perfect for the chilly days approaching winter. Not too many layers, but just enough to be warm and cute!


I layered my Adrienne Landau rabbit fur vest on top of a long-sleeve shirt. This vest is super cozy and tends to invite "pets" because it just looks so soft! It's really warm and a great go-to item for this time of year.

Underneath I wore a staple, my C&C black long-sleeve shirt. I got this shirt at Loehmann's a while ago and it's one of those simple pieces that you can always find a use for. Now that Loehmann's has closed, I'm not sure where I'm going to get my "staples"! I'll be heading back to NJ for the holidays, perhaps Century 21 Department Store can fill in the gaps ;-)

The necklace, which you can only see a peek of, is another staple of mine! I've had it for years and cannot recall from where I got it. All I know is that my friends love it... whenever we have a girls weekend, this necklace tends to get passed around between everybody each night. It's a fan favorite, that's for sure!

Now, a special addition to my #OOTD post... a video feature! I'm a big fan of top knots and I wore one today. Check out my video to learn a little trick about executing a flawless bun!


Music Makes My Mornings

Music is a big part of my morning routine and it has become a lot more enjoyable since upgrading to Spotify Premium! No more waiting for the next streaming song to buffer while at the bus stop with a weak signal. I'm still working to optimize my radio stations but I tend to use the app to listen to "my songs". This morning, Spotify gave me a great randomized playlist that was the perfect combination of vibrant and uplifting. What a pleasant addition to my commute to class! I discovered the first song on this playlist just yesterday - it popped up on the Spotify US Top List and caught my attention right away.

Every few months I discover a song that I like/love and listen to it on repeat, repeat, repeat for a while. (My sweet husband puts up with this with a smile on his face!) I expect Shut Up and Dance to follow a similar pattern in the weeks to come, that is, when I'm not listening to Christmas music! The music video is not my favorite, but there are a few throw backs that made me laugh... The cameo from the "13 Going On 30" actress (0:11 and 3:06) and The "Saved By The Bell" opening credits background (2:22). Did I miss any?

Here's the handful of songs that made me so happy this morning...

  1. Shut Up and Dance by Walk the Moon
  2. Merry Christmas, Happy Holidays by N*Sync [a favorite, any time of the year!]
  3. This Kiss by Faith Hill
  4. Fine By Me by Andy Grammar
  5. All For You by Sister Hazel
The last time a song caught my attention like this was during the Dancing With The Stars' Macy's Stars of Dance. Derek Hough choreographed an amazing routine to Classic by MKTO. Check out the video below...


Tuesday, November 25, 2014

Numbers & Psychology

The marketing position within the C-suite is notorious for fast turnover. Whitler at Forbes describes the position as "The 'Disposable' CMO".

So what is it that sets certain individuals apart? In the words of Rob Malcolm, Executive in Residence at McCombs School of Business, these individuals are "grounded in the numbers and inspired by the psychology." It is the ability to switch between the left-side of their brain (logical, rational, process-oriented) to the right-side of their brand (creative and emotional).

Marketing is moving this way too. Research validates the use of story telling - it is easier to remember, and thus more effective than data alone. (Another example of the shift from rational [data] to emotional [stories].) Some of the best stories that I have seen include Dove and Zales. Watch them below...


These examples both bring the customer along the journey and through the story, tugging on emotions. Really effective, if you ask me. On a [somewhat] related note, Zales made a "Zombies" version of the commercial which I find entertaining.

So you might be asking, what is the takeaway that I'm trying to get at? "grounded in the numbers and inspired by the psychology" ... this is the type of marketer that I hope to be one day.

Sunday, November 23, 2014

Secret Sauce 2.0

When I studied abroad in college I learned a simple go-to recipe for salad dressing. It has only seven ingredients and no exact measurements. It's great on salads and pretty much anything else! When I came back from my semester in Italy I began making this dressing for my roommates - it was an instant hit and always in our fridge! Thus, when I graduated early I made sure to pass it forward. I wrote the recipe down for my friends and I even recorded a how-to video! (I am not kidding.)

Unfortunately, six years ago, during the making of the first video we had some technical errors and the video wasn't completely recorded. That's why when my college roommates came to visit me in Austin earlier this month, I was again inspired to record the making of "Caitlin's Secret Sauce"!

Now, I'd like to share with you, Caitlin's Secret Sauce version 2.0 (a.k.a. version "Grad School").

  1. Start by adding your extra virgin olive oil and balsamic vinegar. I prefer this in a 2:1 ratio, respectively.
  2. Don't worry about following an order for everything else. You'll have to add in:
    1. 3/4 clove of garlic, minced
    2. Salt
    3. Freshly ground pepper
    4. Lemon juice
    5. Dijon mustard
  3. Mix everything together with a fork. Taste and adjust accordingly.
It's super tasty! If you have a chance to try it please let me know. Also, if you tend to prefer sweeter dressings, you could easily put in honey or some sugar to sweeten things up!

Monday, November 17, 2014

Blogging Again with Sausage, Peppers, & Onions

Hello blog-o-sphere! Is it still called that? I cannot believe it has been nearly TWO YEARS since I've last posted. There were many times in that period when I considered getting back on the blogging-bandwagon but for various reasons those moments of inspiration never translated into action. Well, now I'm back and to catch you up as quickly as possible...
  1. I got married!
  2. We moved to Austin, TX!
  3. I started my MBA program at McCombs School of Business at UT-Austin
  4. My husband left consulting and doesn't have to travel for work anymore :)
  5. I interned in NYC over the summer, where my husband and I celebrated our first wedding anniversary
I still love to cook, but I don't bake as much because we tend to eat low carb at home. I still love to craft, though I haven't had a lot of time to satisfy this urge. I did become a professional painter and sold a number of acrylic paintings, mostly of silhouettes of fellow trapeze artists. I also became the female quarterback for the MBA coed flag football team and threw the game-winning touchdown pass in our last game this season!

On to food...

Last night I made us a version of sausage and peppers that combined three or four different recipes, along with a little improvisation with ingredients! It came out really great and I wanted to share the cooking techniques here. If you try it, please let me know what you think! I love feedback. 


  • For this dinner I used four Italian pork sausage links; two mild and two spicy. Take a large skillet with a high lip, put the sausage links in the pan and add one inch of water. Bring to a boil over medium-high heat, cover and let it cook for about 10 minutes.
  • While the sausages are cooking: 
    • Slice half of a large yellow or sweet onion
    • Slice a whole green bell pepper
    • Chop three cloves of garlic (*See note below!)
    • Dice two tomatoes
  • Drain the sausage, add a little olive oil to the pan, then poke the links with a fork on both sides (careful because the juices will squirt out and burn you!), lower the heat to medium and turn the sausages so both sides get a nice crisp. Remove sausages from pan.
  • Keeping the sausage juices in the pan, add in the peppers and onions. Saute them for a few minutes, then add in the garlic, along with some basil and oregano (I sprinkled in dried spices, maybe a tablespoon each), season with salt and pepper.
  • Let this all cook for a few minutes, once things start sticking to the bottom of the pan keep an eye on it for another minute, then - wait for it - pour in some red wine! This was a great addition I had not done previously. I used a Zinfandel that was already open, but any heavy red would do great. The wine will deglaze the pan and let you scrap up all the tasty bits!
  • Now, slice those sausage links on the bias (I cut each link into three pieces) and put them back into the pan. Let it all simmer together for 5 to 10 minutes. Transfer to low bowls and sprinkle with parmesan to serve. Mangia!
We loved this recipe and hope you will to! 

*Note: Chopping the garlic was key! Last year in a cooking class I learned that chop/dice/mince, etc. all have measurements! I typically cut my garlic really small to almost a mince but when you cook it at high heat it will toast (and burn) pretty quickly, which takes away a lot of the awesome garlic flavors. When you cook at a high heat, you'll want to cut your garlic larger, at a chop or a large dice. The garlic flavor from only three cloves in this meal was amazing because I had chopped it larger than I typically do. For those that are interested, this post from The Kitchn does a great job covering the nuances of verbiage you're likely to come across in recipes!

Today I'll leave you with some words of inspiration, in honor of my friend Nicole, from Audrey Hepburn...
"I believe in being strong when everything seems to be going wrong. 
I believe that happy girls are the prettiest girls. 
I believe that tomorrow is another day, and I believe in miracles."
Nicole is battling breast cancer and yesterday had lots of love and support from friends and family at the Susan G. Komen Race for a Cure in Austin. I was not able to join the race in person but supported Nicole in spirit! Recently many MBAs wore our #NicolesBreastFriends shirts to school to rally support and drive donations for the team -- what a success! We love you, Nicole. Kick cancer's butt!


Thursday, January 31, 2013

the journey to flying out of lines


Flying OOL has been on my list of goals for every IFW I have ever participated in. During the requisite goal-setting discussion at the start of each workshop an instructor would ask “What goals do you want to set for yourself?” and I would promptly reply, “I want to fly out of lines.” The note was marked in the long-term area followed by a quick transition to a longer discussion of “short-term goals”. 15 months ago, 12 months ago, seven months ago – each time the goal of flying out of lines still seemed so far in the distance, as if unattainable. But then, all of a sudden, something changed – it’s hard to give credit to one specific moment or activity, surely the progress developed over time – but four months ago at the start of my Fall IFW, my instructor wrote “OOL” on the goal-sheet before even asking me the question and then my instructors began asking about my progress in my Log Book. This was finally becoming a reality!

Last summer I trained for a Tough Mudder and, as a result, I saw a change (read, vast improvement) in my core, arm, and back strength. Suddenly, I could do a pull-up. That was certainly unexpected, as this was where I saw my biggest challenge and assumed that the pull-ups would be my final step to flying out of lines. By mid-September, with my Tough Mudder behind me, I started doing short workouts whenever I could fit them in and Pinterest was a great resource for ideas. I found myself mostly focusing on these two routines; World’s Fastest Workout and Do This 3 Times. Before I knew it, I was doing three pull-ups!

When I saw progress with my conditioning and realized that my instructors kept checking in on my progress, unsolicited, I knew that it was time to make the investment in trampoline classes as well. After all, the journey to flying out of lines is a huge commitment. It is a financial, emotional, and physical commitment –you cannot get there without A LOT of hard work and determination.  At first, trampoline was a lot of fun (and it still is) but it quickly became a lot of hard work. Each time I started a new class there was a hesitation I had to overcome and a comfort level that I had to build back up to, every single time. But once I was there and in it, I was a fast learner and seemed to grasp the new skills with relative ease.

By early November I thought I was ready to try my conditioning test. I was comfortable doing three pull-ups and was excited to get signed-off on this requirement. Unfortunately things didn’t go as planned. Three pull-ups, 15 push-ups, and 17 v-ups later my body gave out. The uncontrollable trembling and pure exhaustion I was experiencing prevented me from completing those last three v-ups. While it was disappointing to attempt and not complete the conditioning requirements, it was a learning experience because it put into perspective that this was not something to be taken lightly and I shouldn’t rush to get everything signed off. I had to put in the effort to reap the reward.

A few trampoline and trapeze classes later I was up on the board! I really enjoyed working the board – the enormous grin plastered on my face serves as adequate evidence. Surprisingly, this gave me the greatest insight into what it would feel like to jump off the board without a belt on. You see, one time the bar was dead and I had to lean out even further with the noodle to retrieve it. I was leaning and not quite reaching it. The instructor up on the board with me reminded me that every time I fly I stick my hips out, so simply do that; grab the rail, lean out, and retrieve the bar with the noodle. I was terrified and there was so much hesitation in my leaning that she eventually opted to hold my belt. That was the biggest dose of reality for what I had set out to do. It was definitely enlightening and little scary, but it did not make me second guess my decision or affect my enthusiasm for flying out of lines.

When I left that class, my instructor told me “See you next week. Are you ready to do your conditioning?” Well, it was time to put up or shut up, “Yes”, I responded and what I did next was unexpected and unplanned, but absolutely necessary. I set up daily requirements to not only perform 2 sets of 10 v-ups and 15 push-ups (I don’t have a pull-up bar at home), but also other exercises that would work the same muscle groups. Essentially, I put myself into “Out of Lines Bootcamp.” Of course I got some support from a community of online flyers…


By day two I was able to do the 20 v-ups and I decided to increase each set by 1 for each day going forward. When my next trapeze class rolled around, I felt ready to go and confident in my abilities. Then my nerves set in – the shaking made it much harder to keep my legs straight during v-ups. But in the end, I did it!! I DID IT! It was an exhausting, exciting, and memorable experience and I was so thankful it was over.

That same night I signed off on my conditioning requirements I also remounted to the board for the first time, completed my board requirements, and got three stamps in my Log Book… What a night that was! The next night I had a trampoline class. Maybe it’s because I was on such a high from the night before, but I nailed the last three skills I had to sign-off on. About halfway through class I actually completed all of my requirements to fly out of lines! From the trampoline to the front desk, and everywhere in between, I was skipping – in excitement – around the rig.

My first class in the new year and it was finally here… time to have the safety talk! Brian sat down to talk to me about the new levels of responsibility I was taking on. We discussed the dangers of flying out of lines and what to expect. A few minutes later I was signing the last of my waivers. And just moments after that I was climbing the ladder without ladder lines, standing on the platform without being hooked in, and eager for my first jump. Not for one moment did I experience fear or hesitation. I had given so much time and energy into this journey; I couldn’t wait for that golden silence of my first swing out of lines. And you know what? It lived up to all of my expectations! 

Friday, December 21, 2012

Christmas came early this year!

Christmas came early this year!! As a result of one of the best weeks of my life, I have a lot of announcements to make...

I've decided to accept my offer from McCombs Business School at the University of Texas-Austin. So, this summer Ross and I are packing up and moving to Austin, Texas!! We are looking forward to living and playing in the city of Austin as a married couple. And, I couldn't be more excited (or humbled) that I have the opportunity to attend a top-20 business school!!

Next up is everything related to Trapeze School New York (TSNY) Washington, DC. First off - have you seen BuzzFeed's list of 21 Unexpected Gifts that Keep on Giving? Well, TSNY is number 7! And I have got to say they are right... TSNY keeps on giving and giving. I had flying trapeze on Wednesday and trampoline on Thursday and here are all of the wonderful things I got out of these classes:

  • Passed my conditioning test (to fly out of lines!)
  • Completed my board requirements (to fly out of lines!)
  • Remounted on the board for the first time (see video below)
  • Remounted on the board for the second time
  • Completed my last three skills on the trampoline
  • Landed an assisted back-flip during trampoline class
  • Received FIVE stamps in my Log Book! (to fly out of lines!)


Do you know what all of this means?! It means that I have completed all of my requirements to fly out of lines!!! Talk about BEST CHRISTMAS PRESENT EVER!! Now I just have to wait - somewhat impatiently - for January 2nd to have my safety talk, sign a few waivers, then climb the ladder and soar!!

This week has been amazing and exhausting! Last night at 11 pm I finally finished the very last of my Christmas presents. And tonight, after packing when I get home, Ross and I are going to hit the road so we can be up in New Jersey with family for the holidays. 

Wednesday, December 19, 2012

homemade christmas goodness


When I posted a picture of my homemade gifts on Facebook last night it received a comment that just literally made my day, week, and month!! An old friend from college said "...how do you make pinterest real?" What a compliment!! Thank you, Christina :) It's true a lot of my inspiration comes from Pinterest, I cannot claim to come up with these ideas all on my own. But many times there are not distinct instructions to follow (or any at all) and so, I'm left to my own vices.

Back in October I began one of this year's Christmas presents - vanilla extract. I was surprised to learn you make vanilla extract simply with a vanilla bean and vodka. That's it! Time could certainly be considered the third ingredient since it takes at least two months to "stew" before it's usable. And so, I stocked up on bottles from Specialty Bottle and picked out some vanilla beans from Beanilla.
 

The ratio of vodka to vanilla I used was:

  • 4 ounces vodka
  • 1/2 vanilla bean
It is important to split your vanilla bean down the middle so that the guts (commonly referred to as the "caviar") are exposed to the vodka. As I began wrapping these bottles up last night, I was tempted to open one and take a whiff because I wanted to make sure what I was giving was up to par. Trust me when I tell you, it smelled heavenly. And the good thing is - this is the gift that keeps on giving! As you use the extract, simply add more vodka to the bottle and the vanilla bean will continue to lend its flavor.
 

The other homemade bottled gift I made was rosemary infused olive oil. I ended up doing this in two batches and learned quite a bit from both experiences! Each bottle was set up with two to three sprigs of fresh rosemary. I warmed the olive oil over low heat on the stove until little tiny bubbles formed. Then I used my trusty filter (it kind of looks like a red silicone tornado in the picture above, no?) to pour olive oil into the bottles. Well, this is where I quickly learned that hot oil does not like to be confined to a small space. The moment the oil poured in, it appeared as though it was boiling! It bubbled and rose up - so the trick here is pour SLOWLY. I let the oil cool overnight before I put the corks on. 

Then, because I didn't trust the corks to stay put in the bottle (especially during holiday travel) I opted to buy some bottle sealer wax beads. For sealing the bottles you'll need:
  • Pot of boiling water
  • Empty can
  • Wooden/disposable stirrer
Add about one to two inches of water into your pot, not high enough for the water to spill into the can. When the water is almost at a boil, pour the wax beads into your empty can and place the can in the water. My can wasn't heavy enough to sink to the bottom, so it floated around a lot. I was concerned that it would tip over but that never happened. I used a wooden kabob stick to stir the wax as it melted. Once it was all melted, take the can out of the water (I suggest using oven mitts!) and place it on a solid surface, i.e., countertop. You'll then invert the top of the bottle into the liquid wax. I decided to do two dips because the first seemed somewhat translucent. Two was perfect - and I used my wax stamp to add the fleur de lis detail to the top!

I used a simple velvet ribbon tied around the neck of each bottle, with a small homemade tag, and a golden bell. The ribbon and bells were purchased at Michaels. I just love how these turned out and I'm excited to gift them this coming week!

Thursday, December 13, 2012

peanut butter bacon treats for the pups

There are lots of lovely dogs in my life... and unfortunately none of them belong to me. But that doesn't mean I don't love them. So, to fill their Christmas stockings I made some homemade doggie treats! I found this recipe on Pinterest and feel excited that they can have a natural treat made with only fresh ingredients!

Out of this recipe I got 48 treats using a 1 1/2 inch heart-shaped cookie cutter. I rolled the dough out to about a quarter-inch thick, maybe a little thinner.


My first battle was figuring out how to grind the whole flax seed I picked up at Wegmans. I went with the food processor but had no luck, surprisingly. At first I tried only a few tablespoons of seeds, then I dumped in the whole bag (since whole flax seed aren't digestible, it would all have to get ground anyway). Still, no success. Then I decided to try the mortar and pestle I got Ross for Christmas last year. Part of me was thinking about rural villages in Latin America - those ladies grinding corn into corn meal between two stones. Unfortunately the granite mortar and pestle didn't do the trick. A little google searching and I found out that a coffee grinder is the best option! I was concerned that the next batch of coffee beans that went in would be tainted, but Ross said I could use it and the coffee would still be just fine. (Coffee is his responsibility in our house... I'm not much of a morning person!) So, in went the flax seed and low-and-behold out comes a nice finely ground powder. I only needed 1.5 tablespoons so we have a LOT left over. Perhaps we will use it on our morning oatmeal or sprinkled over other recipes. Afterall, it has TONS of nutritious benefits.

My friend Tiffany asked me how I made these dog treats (which prompted me the post about them!) So, Tiffany, if you decide to make dog treats of your own, let me know if you need some ground flax seed! I've got tons left over and I'd be more than happy to drop some off at trapeze school for ya!


Peanut Butter Bacon Treats

  • 1/8 cup bacon drippings
  • 1 1/2 tablespoons ground flax seed
  • 1/8 teaspoon sea salt
  • 1/4 cup peanut butter (I recommend natural and creamy)
  • 1 1/4 cups whole wheat flour
  • 1/2 cup chicken or beef broth
Combine all ingredients in a bowl and roll the dough into a ball, then flatten into a disk. Roll the dough out to 1/4 inch thick. Use a cookie cutter of your desired size, or a fluted pastry wheel/pizza wheel to cut out squares. Place the treats on a cookie sheet and bake for 25 minutes at 350 degrees. If you have more than one cookie sheet, rotate them halfway through.


In other holiday news - I figured out a neat, affordable way to display our Christmas cards!! Simply hang a ribbon over a door. Currently ours is hanging on with tape. I have a feeling that as we add more cards the ribbon may need to be tacked in. But - this works great for now! I'm using paper clips to keep each set of cards on there.

Thursday, December 6, 2012

giving back

The day we got back from Thanksgiving break I put out all of our, albeit few, holiday decorations! This includes a mini Christmas tree, complete with baubles, in the center of our kitchen island; two wreaths with golden apples decorating our living space; and a "Merry Christmas Y'all" towel over our oven's handle. I just love the Christmas season!! Our cards have been sent and I can't wait to start receiving cards from other people. I have even made significant progress in gift wrapping already!

Inspired by Pinterest... This year is kraft paper with stamping and handmade tags!
And tonight, for the third year in a row, I will be going to the Community Family Life Services Holiday Party! I volunteer with CFLS through the Junior League and absolutely love spending time with these women. Tonight we have a group of volunteers that organized a holiday party and I offered to bring some baked ziti for dinner. Since there's no oven to warm the pasta in, I had to come up with an alternative cooking method. Behold baked ziti in a crockpot!! Last night I cooked some sausage with onion and garlic. This morning I assembled the dish and carried it into work. I just plugged in the crockpot so it can simmer and cook away in my cubicle until heading to the party after work. Here's a link to the recipe, in case you're interested!


So with the holiday party and families in mind, I decided to put a little holiday cheer into my outfit today! Complete with silver baubles, red tank top, and reindeer socks! Everybody at the office is getting quite a kick out of these socks, I must say :)


Have you started getting ready for the holidays?

Wednesday, December 5, 2012

underneath your clothes

{Thank you to Shakira for inspiring my blog post title today!}

We've all read Fifty Shades of Grey. So we shouldn't be aghast at what I'm going to talk about today. Just saying.

Scandalous!
I got to thinking... Anastasia wears thigh highs to work... A LOT. Part of that is built into the book for obvious reasons. But the realist in me thought; "Well, that makes a lot of sense. You don't have to deal with tights during every trip to the restroom." Of course all of my work dresses and skirts are more than long enough to cover up a pair of thigh highs, so why hadn't I thought of this before?

With the unseasonably warm weather DC has been experiencing these past few days, now is the perfect time to try this out. After a quick conversation with a coworker and finding out that, in fact, she was wearing thigh highs, I didn't think it was quite as scandalous anymore. So I decided to give it a try...

I'm not 100% sure how I feel about this. During my commute I was conscious as to whether my dress hem rose as I held on to the metro railing above my head. When I sat down in my chair I was very aware of where my dress fell. And to be honest, it's a little bizarre to notice my thighs touching as I walk. Weird, I know. But despite all of this, I think this is a great alternative in warmer weather and I am willing to give it another go.

For more fun facts about "underneath my clothes" today - have you ever noticed a little snap and piece of string or fabric on the inside shoulder of your blouse or dress? That is designed to keep your bra straps in line. It's very convenient with soft fabrics, like silk, or wide necklines. And, it's not something only available on high-end clothing! In fact, I'm wearing a Banana Republic dress today and it has these little guys. It is such a game-changing feature for a piece of clothing, it can significantly influence my purchasing decision.


Have you ever worn thigh highs to work? Or out at night, for convenience? And, do you also love the bra snaps on shirts and dresses?

Monday, December 3, 2012

december weekend in review

We had a lovely weekend filled with tasty food, great friends, and fun activities! Friday started off with homemade chicken pot pies. There are a number of reasons I love these guys:

  • I had previously not had chicken pot pie
  • I got to use the mini cocottes Ross bought me for my last birthday
  • I used a couple recipes for inspiration but ultimately estimated the amounts of each ingredient to build three mini pot pies. This was one of my first times not following a recipe exactly and it worked out really well! As a result I have so much more confidence in my cooking skills and overall instinct in the kitchen
Chicken Pot Pies pre-bake

After eating our chicken pot pies, fresh out of the oven, we checked out the new ice skating rink in our neighborhood!! It has been two years since I went ice skating and since I did this competitively as a child, it's an activity that brings back so many wonderful memories. I'm glad that Ross was able to share in this experience with me :)

Love my cheetah print blade covers!

Saturday afternoon I finally found some time to  jazz up my nails! I went for a tribal nail art design I had previously seen on pinterest. For the horizontal lines and the V-shape, I used the brush from the polish bottle (Lincoln Park After Dark by OPI and Blanc by Essie as the base). I did use my new nail art brushes to clean up the edges and add the little triangles on the sides. Overall, I was really excited with the output. After finishing my nails Ross and I spent Saturday night with a close friend enjoying some champagne, a wedge of brie, and a selection of pates!! What a gluttonous evening... but worth every calorie!

Sunday afternoon we got together with coworkers for a bottomless tapas and drinks brunch at Boqueria in DC. The Chef's Table (bottomless) is fantastic - the wait staff is on top of everything and have seamless transitions between the plates. The food was so tasty. Per group consensus, the top dishes were scrambled eggs with sausage, mushrooms, and goat cheese; sauteed mushrooms; pancakes; and nutella stuffed churros. If you plan to go with the Chef's Table make sure you arrive at Boqueria hungry and without any further plans to eat for the rest of the day!!

#OOTD
Overall, I'd say it was a wonderful weekend! What a great way to kick off December and the holiday season. Although, waking up to unseasonable warm weather this morning was unusual. Thankfully I got to take advantage of it by wearing a favorite Diane von Furstenberg silk dress. The dress has a vintage feel and an art-deco flair. It's such a fun statement piece, all on its own!

Thursday, November 29, 2012

bread crumbs

I'm a big fan of bread crumbs. Yes, this usually involves pan frying - not the healthiest preparation option, but delicious nonetheless. However, it can also involve baking! Such as homemade chicken nuggets :)

I almost always have a combination of Panko bread crumbs and Italian seasoned bread crumbs on hand. My favorite seasoned breadcrumbs are from 4C but those are not available at my local super market. Sometimes I go with Progresso, though currently I have Cento and they're really good!


I had some extra white bread left over after Thanksgiving and since we're not a white bread kind of couple, I decided to make some homemade bread crumbs. I left them plain, rather than seasoned but I can always add spices and herbs to them in the future. Simply lay out the bread so that it gets a little stale. You'll notice a change in texture within a few hours.


At that point, break up your bread into pieces and drop it into a food processor. Turn on the food processor to get a nice fine grind of your stale bread!

Transfer your crumbs into a bowl. Pour some olive oil and add salt and pepper. Mix with your hands to combine.

Spread your crumbs out on a baking sheet and pop them in a 350 degree oven for 6 to 8 minutes. Watch carefully because they'll quickly switch from golden brown to burnt!!

Enjoy your new breadcrumbs on chicken nuggets, eggplant parmigiana, and more!!


Wednesday, November 28, 2012

animal print


Major fashionista validation this week, folks! I posted my Monday attire on Instagram and when I logged on later in the day, I saw that Elie Tahari (@elietahari) liked my picture! I'm guessing that there's a PR person behind the instagram account, but it was such a fun surprise and huge compliment nonetheless.  I was wearing an Elie Tahari animal print (snake skin?) skirt with a charcoal gray turtle neck, black Tory Burch cardigan, and one of my favorite Pono statement necklaces.  Because the skirt has a fairly large slit in the front, which naturally separates when I sit, I paired this with solid black tights. My charcoal gray suede Bettye Muller booties were the perfect finishing touch.


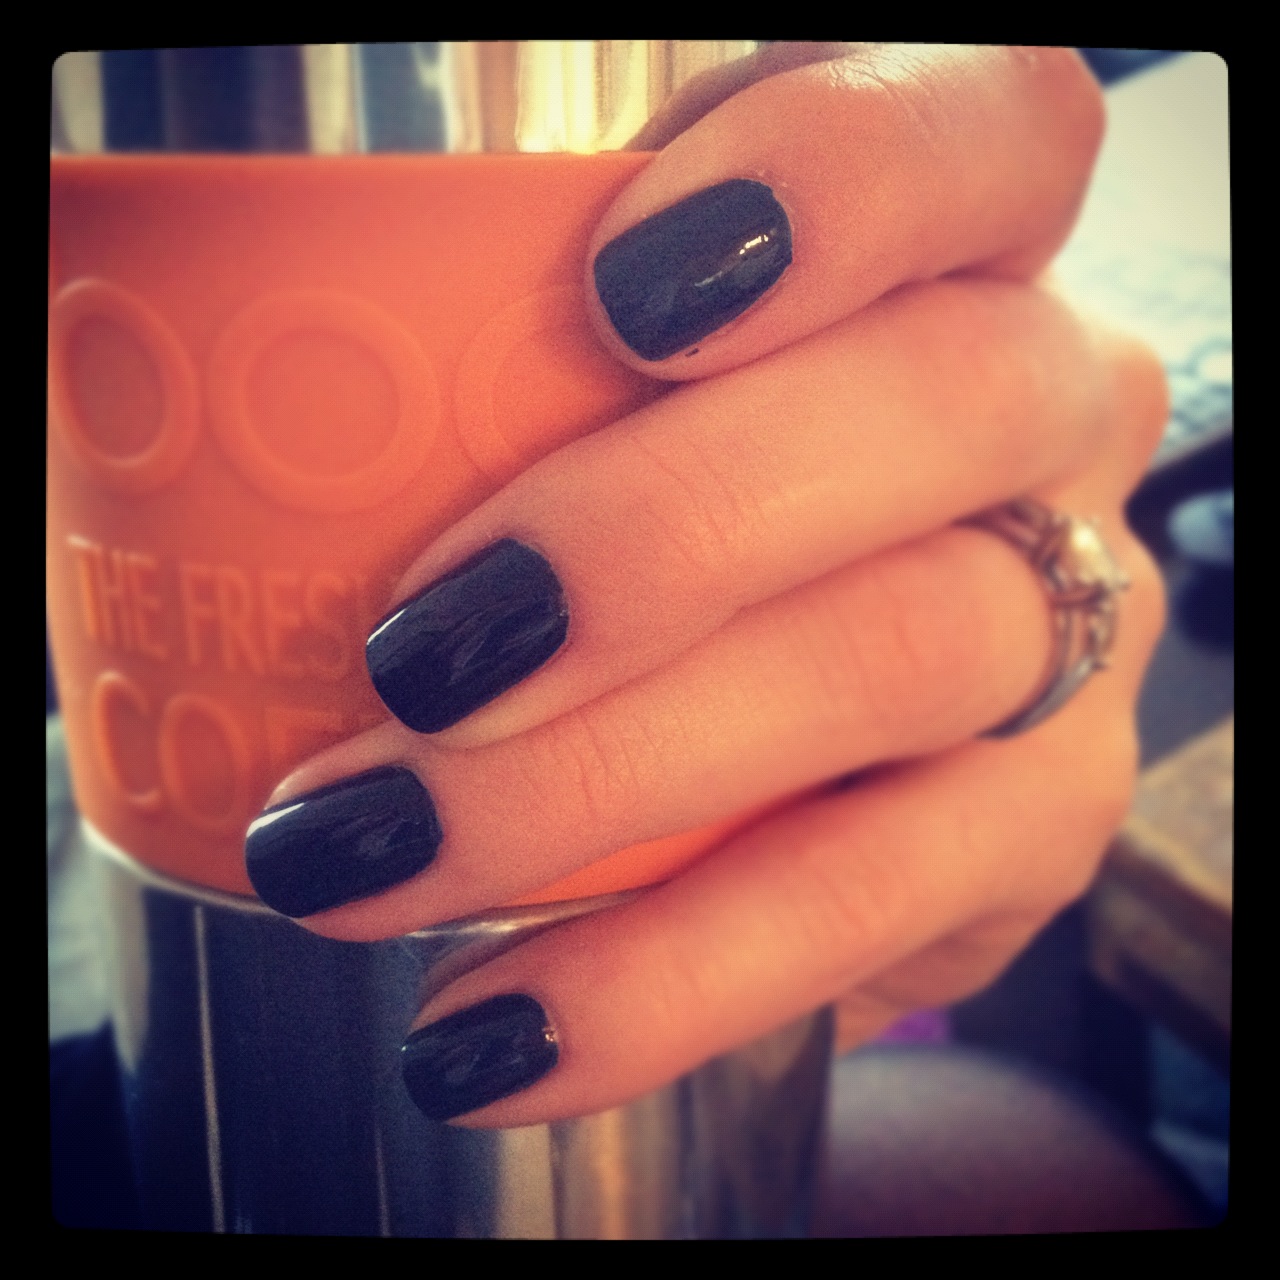
I used a blue Avon nail polish to change my nails earlier this week. I'm hoping to add a floral design for an accent finger if I find some time this evening - it's been a while since I had a fun design on my nails!


And here's Tuesday's outfit... more animal print! The top is a sweater jacket from Michael Simon. And my tights are from Spanx - they make fabulous patterned tights which can frequently be found on sale at Rue La La!

Closing note to my readers: I am now less than 100 page views away from 20,000 lifetime page views!! And while I started this blog nearly five years ago, most of this traffic has been generated in the past 15 months since my relaunch. This is a huge milestone that I am beyond excited to celebrate. Thank you to each and every one of you for reading, following, and commenting!!

Tuesday, November 27, 2012

sponge bun

I recently tried out the "sponge bun", aka Bun Maker, by Conair. A friend of mine recently used one, and it looked great! I did some research and YouTube watching to figure out the best approach on how to use it. I have a lot of hair and it's currently medium length, so I wasn't sure how I was going to wrap it around and secure it to the sponge bun. I went with an approach similar to the directions on the back of the box;

  • Secure hair in a ponytail
  • Pull ponytail through the center of the sponge bun so it's resting around the elastic
  • Take sections of hair and wrap it over that section of the sponge bun, secure with a bobby pin
  • Wrap the rest of that section around the sponge bun, continuing to secure with pins

Because I have so much hair and it's rather heavy, this wasn't the best approach. The look I achieved was favorable, though; a chic messy bun with lots of volume. However, I had to continue to play with the bobby pins all day and chose to remove it completely around 3 pm. At that point I twisted my hair into a bun and secured it with an elastic - I'm lucky enough that I can achieve a full bun with just my hair!

Next time I might try the rolling technique. This involves securing a ponytail and using the sponge bun from the tip of the tail and rolling your hair around as you roll the sponge bun towards your head.