Friday, December 21, 2012

Christmas came early this year!

Christmas came early this year!! As a result of one of the best weeks of my life, I have a lot of announcements to make...

I've decided to accept my offer from McCombs Business School at the University of Texas-Austin. So, this summer Ross and I are packing up and moving to Austin, Texas!! We are looking forward to living and playing in the city of Austin as a married couple. And, I couldn't be more excited (or humbled) that I have the opportunity to attend a top-20 business school!!

Next up is everything related to Trapeze School New York (TSNY) Washington, DC. First off - have you seen BuzzFeed's list of 21 Unexpected Gifts that Keep on Giving? Well, TSNY is number 7! And I have got to say they are right... TSNY keeps on giving and giving. I had flying trapeze on Wednesday and trampoline on Thursday and here are all of the wonderful things I got out of these classes:

  • Passed my conditioning test (to fly out of lines!)
  • Completed my board requirements (to fly out of lines!)
  • Remounted on the board for the first time (see video below)
  • Remounted on the board for the second time
  • Completed my last three skills on the trampoline
  • Landed an assisted back-flip during trampoline class
  • Received FIVE stamps in my Log Book! (to fly out of lines!)


Do you know what all of this means?! It means that I have completed all of my requirements to fly out of lines!!! Talk about BEST CHRISTMAS PRESENT EVER!! Now I just have to wait - somewhat impatiently - for January 2nd to have my safety talk, sign a few waivers, then climb the ladder and soar!!

This week has been amazing and exhausting! Last night at 11 pm I finally finished the very last of my Christmas presents. And tonight, after packing when I get home, Ross and I are going to hit the road so we can be up in New Jersey with family for the holidays. 

Wednesday, December 19, 2012

homemade christmas goodness


When I posted a picture of my homemade gifts on Facebook last night it received a comment that just literally made my day, week, and month!! An old friend from college said "...how do you make pinterest real?" What a compliment!! Thank you, Christina :) It's true a lot of my inspiration comes from Pinterest, I cannot claim to come up with these ideas all on my own. But many times there are not distinct instructions to follow (or any at all) and so, I'm left to my own vices.

Back in October I began one of this year's Christmas presents - vanilla extract. I was surprised to learn you make vanilla extract simply with a vanilla bean and vodka. That's it! Time could certainly be considered the third ingredient since it takes at least two months to "stew" before it's usable. And so, I stocked up on bottles from Specialty Bottle and picked out some vanilla beans from Beanilla.
 

The ratio of vodka to vanilla I used was:

  • 4 ounces vodka
  • 1/2 vanilla bean
It is important to split your vanilla bean down the middle so that the guts (commonly referred to as the "caviar") are exposed to the vodka. As I began wrapping these bottles up last night, I was tempted to open one and take a whiff because I wanted to make sure what I was giving was up to par. Trust me when I tell you, it smelled heavenly. And the good thing is - this is the gift that keeps on giving! As you use the extract, simply add more vodka to the bottle and the vanilla bean will continue to lend its flavor.
 

The other homemade bottled gift I made was rosemary infused olive oil. I ended up doing this in two batches and learned quite a bit from both experiences! Each bottle was set up with two to three sprigs of fresh rosemary. I warmed the olive oil over low heat on the stove until little tiny bubbles formed. Then I used my trusty filter (it kind of looks like a red silicone tornado in the picture above, no?) to pour olive oil into the bottles. Well, this is where I quickly learned that hot oil does not like to be confined to a small space. The moment the oil poured in, it appeared as though it was boiling! It bubbled and rose up - so the trick here is pour SLOWLY. I let the oil cool overnight before I put the corks on. 

Then, because I didn't trust the corks to stay put in the bottle (especially during holiday travel) I opted to buy some bottle sealer wax beads. For sealing the bottles you'll need:
  • Pot of boiling water
  • Empty can
  • Wooden/disposable stirrer
Add about one to two inches of water into your pot, not high enough for the water to spill into the can. When the water is almost at a boil, pour the wax beads into your empty can and place the can in the water. My can wasn't heavy enough to sink to the bottom, so it floated around a lot. I was concerned that it would tip over but that never happened. I used a wooden kabob stick to stir the wax as it melted. Once it was all melted, take the can out of the water (I suggest using oven mitts!) and place it on a solid surface, i.e., countertop. You'll then invert the top of the bottle into the liquid wax. I decided to do two dips because the first seemed somewhat translucent. Two was perfect - and I used my wax stamp to add the fleur de lis detail to the top!

I used a simple velvet ribbon tied around the neck of each bottle, with a small homemade tag, and a golden bell. The ribbon and bells were purchased at Michaels. I just love how these turned out and I'm excited to gift them this coming week!

Thursday, December 13, 2012

peanut butter bacon treats for the pups

There are lots of lovely dogs in my life... and unfortunately none of them belong to me. But that doesn't mean I don't love them. So, to fill their Christmas stockings I made some homemade doggie treats! I found this recipe on Pinterest and feel excited that they can have a natural treat made with only fresh ingredients!

Out of this recipe I got 48 treats using a 1 1/2 inch heart-shaped cookie cutter. I rolled the dough out to about a quarter-inch thick, maybe a little thinner.


My first battle was figuring out how to grind the whole flax seed I picked up at Wegmans. I went with the food processor but had no luck, surprisingly. At first I tried only a few tablespoons of seeds, then I dumped in the whole bag (since whole flax seed aren't digestible, it would all have to get ground anyway). Still, no success. Then I decided to try the mortar and pestle I got Ross for Christmas last year. Part of me was thinking about rural villages in Latin America - those ladies grinding corn into corn meal between two stones. Unfortunately the granite mortar and pestle didn't do the trick. A little google searching and I found out that a coffee grinder is the best option! I was concerned that the next batch of coffee beans that went in would be tainted, but Ross said I could use it and the coffee would still be just fine. (Coffee is his responsibility in our house... I'm not much of a morning person!) So, in went the flax seed and low-and-behold out comes a nice finely ground powder. I only needed 1.5 tablespoons so we have a LOT left over. Perhaps we will use it on our morning oatmeal or sprinkled over other recipes. Afterall, it has TONS of nutritious benefits.

My friend Tiffany asked me how I made these dog treats (which prompted me the post about them!) So, Tiffany, if you decide to make dog treats of your own, let me know if you need some ground flax seed! I've got tons left over and I'd be more than happy to drop some off at trapeze school for ya!


Peanut Butter Bacon Treats

  • 1/8 cup bacon drippings
  • 1 1/2 tablespoons ground flax seed
  • 1/8 teaspoon sea salt
  • 1/4 cup peanut butter (I recommend natural and creamy)
  • 1 1/4 cups whole wheat flour
  • 1/2 cup chicken or beef broth
Combine all ingredients in a bowl and roll the dough into a ball, then flatten into a disk. Roll the dough out to 1/4 inch thick. Use a cookie cutter of your desired size, or a fluted pastry wheel/pizza wheel to cut out squares. Place the treats on a cookie sheet and bake for 25 minutes at 350 degrees. If you have more than one cookie sheet, rotate them halfway through.


In other holiday news - I figured out a neat, affordable way to display our Christmas cards!! Simply hang a ribbon over a door. Currently ours is hanging on with tape. I have a feeling that as we add more cards the ribbon may need to be tacked in. But - this works great for now! I'm using paper clips to keep each set of cards on there.

Thursday, December 6, 2012

giving back

The day we got back from Thanksgiving break I put out all of our, albeit few, holiday decorations! This includes a mini Christmas tree, complete with baubles, in the center of our kitchen island; two wreaths with golden apples decorating our living space; and a "Merry Christmas Y'all" towel over our oven's handle. I just love the Christmas season!! Our cards have been sent and I can't wait to start receiving cards from other people. I have even made significant progress in gift wrapping already!

Inspired by Pinterest... This year is kraft paper with stamping and handmade tags!
And tonight, for the third year in a row, I will be going to the Community Family Life Services Holiday Party! I volunteer with CFLS through the Junior League and absolutely love spending time with these women. Tonight we have a group of volunteers that organized a holiday party and I offered to bring some baked ziti for dinner. Since there's no oven to warm the pasta in, I had to come up with an alternative cooking method. Behold baked ziti in a crockpot!! Last night I cooked some sausage with onion and garlic. This morning I assembled the dish and carried it into work. I just plugged in the crockpot so it can simmer and cook away in my cubicle until heading to the party after work. Here's a link to the recipe, in case you're interested!


So with the holiday party and families in mind, I decided to put a little holiday cheer into my outfit today! Complete with silver baubles, red tank top, and reindeer socks! Everybody at the office is getting quite a kick out of these socks, I must say :)


Have you started getting ready for the holidays?

Wednesday, December 5, 2012

underneath your clothes

{Thank you to Shakira for inspiring my blog post title today!}

We've all read Fifty Shades of Grey. So we shouldn't be aghast at what I'm going to talk about today. Just saying.

Scandalous!
I got to thinking... Anastasia wears thigh highs to work... A LOT. Part of that is built into the book for obvious reasons. But the realist in me thought; "Well, that makes a lot of sense. You don't have to deal with tights during every trip to the restroom." Of course all of my work dresses and skirts are more than long enough to cover up a pair of thigh highs, so why hadn't I thought of this before?

With the unseasonably warm weather DC has been experiencing these past few days, now is the perfect time to try this out. After a quick conversation with a coworker and finding out that, in fact, she was wearing thigh highs, I didn't think it was quite as scandalous anymore. So I decided to give it a try...

I'm not 100% sure how I feel about this. During my commute I was conscious as to whether my dress hem rose as I held on to the metro railing above my head. When I sat down in my chair I was very aware of where my dress fell. And to be honest, it's a little bizarre to notice my thighs touching as I walk. Weird, I know. But despite all of this, I think this is a great alternative in warmer weather and I am willing to give it another go.

For more fun facts about "underneath my clothes" today - have you ever noticed a little snap and piece of string or fabric on the inside shoulder of your blouse or dress? That is designed to keep your bra straps in line. It's very convenient with soft fabrics, like silk, or wide necklines. And, it's not something only available on high-end clothing! In fact, I'm wearing a Banana Republic dress today and it has these little guys. It is such a game-changing feature for a piece of clothing, it can significantly influence my purchasing decision.


Have you ever worn thigh highs to work? Or out at night, for convenience? And, do you also love the bra snaps on shirts and dresses?

Monday, December 3, 2012

december weekend in review

We had a lovely weekend filled with tasty food, great friends, and fun activities! Friday started off with homemade chicken pot pies. There are a number of reasons I love these guys:

  • I had previously not had chicken pot pie
  • I got to use the mini cocottes Ross bought me for my last birthday
  • I used a couple recipes for inspiration but ultimately estimated the amounts of each ingredient to build three mini pot pies. This was one of my first times not following a recipe exactly and it worked out really well! As a result I have so much more confidence in my cooking skills and overall instinct in the kitchen
Chicken Pot Pies pre-bake

After eating our chicken pot pies, fresh out of the oven, we checked out the new ice skating rink in our neighborhood!! It has been two years since I went ice skating and since I did this competitively as a child, it's an activity that brings back so many wonderful memories. I'm glad that Ross was able to share in this experience with me :)

Love my cheetah print blade covers!

Saturday afternoon I finally found some time to  jazz up my nails! I went for a tribal nail art design I had previously seen on pinterest. For the horizontal lines and the V-shape, I used the brush from the polish bottle (Lincoln Park After Dark by OPI and Blanc by Essie as the base). I did use my new nail art brushes to clean up the edges and add the little triangles on the sides. Overall, I was really excited with the output. After finishing my nails Ross and I spent Saturday night with a close friend enjoying some champagne, a wedge of brie, and a selection of pates!! What a gluttonous evening... but worth every calorie!

Sunday afternoon we got together with coworkers for a bottomless tapas and drinks brunch at Boqueria in DC. The Chef's Table (bottomless) is fantastic - the wait staff is on top of everything and have seamless transitions between the plates. The food was so tasty. Per group consensus, the top dishes were scrambled eggs with sausage, mushrooms, and goat cheese; sauteed mushrooms; pancakes; and nutella stuffed churros. If you plan to go with the Chef's Table make sure you arrive at Boqueria hungry and without any further plans to eat for the rest of the day!!

#OOTD
Overall, I'd say it was a wonderful weekend! What a great way to kick off December and the holiday season. Although, waking up to unseasonable warm weather this morning was unusual. Thankfully I got to take advantage of it by wearing a favorite Diane von Furstenberg silk dress. The dress has a vintage feel and an art-deco flair. It's such a fun statement piece, all on its own!

Thursday, November 29, 2012

bread crumbs

I'm a big fan of bread crumbs. Yes, this usually involves pan frying - not the healthiest preparation option, but delicious nonetheless. However, it can also involve baking! Such as homemade chicken nuggets :)

I almost always have a combination of Panko bread crumbs and Italian seasoned bread crumbs on hand. My favorite seasoned breadcrumbs are from 4C but those are not available at my local super market. Sometimes I go with Progresso, though currently I have Cento and they're really good!


I had some extra white bread left over after Thanksgiving and since we're not a white bread kind of couple, I decided to make some homemade bread crumbs. I left them plain, rather than seasoned but I can always add spices and herbs to them in the future. Simply lay out the bread so that it gets a little stale. You'll notice a change in texture within a few hours.


At that point, break up your bread into pieces and drop it into a food processor. Turn on the food processor to get a nice fine grind of your stale bread!

Transfer your crumbs into a bowl. Pour some olive oil and add salt and pepper. Mix with your hands to combine.

Spread your crumbs out on a baking sheet and pop them in a 350 degree oven for 6 to 8 minutes. Watch carefully because they'll quickly switch from golden brown to burnt!!

Enjoy your new breadcrumbs on chicken nuggets, eggplant parmigiana, and more!!


Wednesday, November 28, 2012

animal print


Major fashionista validation this week, folks! I posted my Monday attire on Instagram and when I logged on later in the day, I saw that Elie Tahari (@elietahari) liked my picture! I'm guessing that there's a PR person behind the instagram account, but it was such a fun surprise and huge compliment nonetheless.  I was wearing an Elie Tahari animal print (snake skin?) skirt with a charcoal gray turtle neck, black Tory Burch cardigan, and one of my favorite Pono statement necklaces.  Because the skirt has a fairly large slit in the front, which naturally separates when I sit, I paired this with solid black tights. My charcoal gray suede Bettye Muller booties were the perfect finishing touch.


I used a blue Avon nail polish to change my nails earlier this week. I'm hoping to add a floral design for an accent finger if I find some time this evening - it's been a while since I had a fun design on my nails!


And here's Tuesday's outfit... more animal print! The top is a sweater jacket from Michael Simon. And my tights are from Spanx - they make fabulous patterned tights which can frequently be found on sale at Rue La La!

Closing note to my readers: I am now less than 100 page views away from 20,000 lifetime page views!! And while I started this blog nearly five years ago, most of this traffic has been generated in the past 15 months since my relaunch. This is a huge milestone that I am beyond excited to celebrate. Thank you to each and every one of you for reading, following, and commenting!!

Tuesday, November 27, 2012

sponge bun

I recently tried out the "sponge bun", aka Bun Maker, by Conair. A friend of mine recently used one, and it looked great! I did some research and YouTube watching to figure out the best approach on how to use it. I have a lot of hair and it's currently medium length, so I wasn't sure how I was going to wrap it around and secure it to the sponge bun. I went with an approach similar to the directions on the back of the box;

  • Secure hair in a ponytail
  • Pull ponytail through the center of the sponge bun so it's resting around the elastic
  • Take sections of hair and wrap it over that section of the sponge bun, secure with a bobby pin
  • Wrap the rest of that section around the sponge bun, continuing to secure with pins

Because I have so much hair and it's rather heavy, this wasn't the best approach. The look I achieved was favorable, though; a chic messy bun with lots of volume. However, I had to continue to play with the bobby pins all day and chose to remove it completely around 3 pm. At that point I twisted my hair into a bun and secured it with an elastic - I'm lucky enough that I can achieve a full bun with just my hair!

Next time I might try the rolling technique. This involves securing a ponytail and using the sponge bun from the tip of the tail and rolling your hair around as you roll the sponge bun towards your head.

Wednesday, November 21, 2012

Pretty packaging

This weekend I made some chocolate drop cookies, mentioned in this post. Some were for thank you gifts and I wanted to deliver them in a special way. I had seen a few variations for packaging cookies on Pinterest and I was excited to try them! The first was made from an empty container of bread crumbs. I peeled off the label and taped on some wrapping paper. I used kitchen twine to tie a "thank you" note around it.

One thing I noticed half-way through baking my cookies was that the opening in this container was smaller than I thought. So I had to adjust the amount of batter I put down on the baking sheet so that the cookies would be smaller. Make sure you check out your container before or during baking so that you can adjust accordingly.

My next packaging idea was so simple - it's just a little something extra on a sandwich bag. It came out so wonderfully, it even surprised me! I simply placed cookies into a sandwich bag. Then I used some cardstock and measured out a rectangle about the length of the bag and three inches high. I folded the paper in half and drew a design on the front, with a message on the back. I stapled the cardstock to the top of the sandwich bag, and I just love how it turned out!


Now that the holidays are around the corner (THANKSGIVING IS TOMORROW!!!!!!) how do you plan to deliver your cookies? I know tins are a go-to... in fact, I saw a great post on Newlyweds on a Budget on how to customize and shnaz up your tins.


Tuesday, November 20, 2012

Someone's in the kitchen... on Sunday!


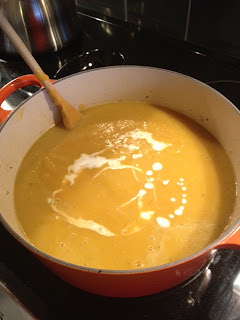
Sunday was a little less hectic. I set to work making a winter squash soup for Thanksgiving weekend. It's a delicious blend of acorn and butternut squashes. I have not made the gruyere croutons with this soup, because I feel that it doesn't need the added richness. It's really quite phenomenal as is and I'm looking forward to having some for lunch this coming Friday.

I had extra butternut squash left over and because I got hungry in the late afternoon, I chose to make some roasted butternut squash to nosh on. It was very easy to make and delicious as well! I simply put the 1 inch cubes of squash into a bowl, poured a little maple syrup (maple syrup not breakfast syrup... I highly prefer the real stuff) and melted butter on top. Then I grated a nutmeg over it all and finished it off with some cinnamon. I tossed these ingredients around and laid the squash out on top of some parchment paper on a cookie sheet. They baked for about 45 minutes at 350 degrees and came out sweet and soft. The syrup caramelized the slightest bit which was quite a pleasant surprise.


For dinner I made homemade chicken nuggets and parmesan-rosemary french fries. These are real simple things to put together, and a very inexpensive dinner! The best trick to get crunchy fries is to cut your potato and soak the pieces in a bowl of water. When your potato is in water it soaks out the starch and helps your potatoes get crunchy while in the oven. I took the fries out of the water and put them into another bowl. I poured some extra virgin olive oil on top and sprinkled parmesan cheese, fresh ground black pepper, and rosemary. I tossed them around and laid them out on a parchment lined baking sheet. 

Note: extra virgin olive oil burns very easily. Don't use any heat higher than medium on a stovetop and don't put your oven over 350 degrees. I had my fries in the oven for almost 50 minutes at 350, turning them a few times in between. They did stay in at 400 while the chicken was baking but by that time a lot of the oil had either cooked off or soaked in, I'm not sure where it went, but the fries were A-OK.

Homemade nuggets and crispy fries! And, you can just see a little bit of the squash at the top-left corner of my plate :)
For the nuggs - and let me say, I am a self-proclaimed nugg nut and I am serious about my nuggets. As I was saying, for the nuggs, set up two separate bowls. In one, pour some olive oil, maybe 1/3 cup, and add some salt and pepper. In the other, add some Italian seasoned bread crumbs, panko bread crumbs, and parmesan cheese. Mix the dry ingredients together to blend. Cut up a chicken breast (or two) into 1-2 inch bite sized pieces. Add the chicken into the olive oil to get well coated and transfer the pieces over to the bread crumbs. I usually take 3-4 pieces and shake them in my hand a little so the excess olive oil falls between my fingers. Then I use my other, dry, hand and coat the pieces. Place these nuggs on a baking sheet. (I wish I could tell you to do a parchment lined sheet, but in fact I used aluminum foil and the breading stuck. Cooking fail. I'll try parchment next time!) These bad boys bake for about 20 minutes at 400 degrees. Serve with some honey mustard and ketchup. 

Nom. Nom. Nom.

Monday, November 19, 2012

Someone's in the kitchen... on Saturday!

This weekend reinforced my love for being in the kitchen. On Saturday afternoon I spent nearly six hours on my feet cooking and baking, only to realize around hour five that my feet were hurting and maybe I should put some shoes on! Well, that didn't stop me because I also spent the better part of Sunday in the kitchen. Here I'm going to talk about all the goodies and meals I made this weekend, but stay tuned for another post soon about some wrapping and presentation ideas!

Oh, look at that messy island! My kitchen scale, front and center, is one gadget I cannot live without. I thank my fiancee for introducing me to how amazing they are!

I started out with a red velvet cupcake. I was making them the same day I was serving them, so I needed ample time for the cupcakes to cool before icing. I was super excited for the icing because I had bought a size 16 star tip for my pastry bags which I had not previously used. I planned to put it to work on these! I followed the Martha Stewart recipes for the cupcakes and the icing and with the exception of halfing the recipes, I did not make any adjustments. I had extra icing left over, but that's not really a terrible problem to have ;-)
Yummy, tasty goodness!
When I brought these cupcakes to the party, they were a big hit! One party goer even told me that it was better than a lot of wedding cakes she's been tasting for her upcoming nuptials. Clearly, that was one of the best compliments I have ever gotten!!

I also had a thank you gift to make, which I promised to deliver in the form of baked goods. I decided to go for my very favorite cookie recipe; Chocolate Drop Cookies with Heath Bar, Vanilla Chips, and Pecans from The Magnolia Bakery. I tend to substitute the pecans with whichever nuts I have on stock at home. This time I used a blend of hazelnuts and toasted walnuts. Also, in case you're wondering what the heck vanilla chips are - I go with plain ol' white chocolate chips. Ghirardelli or Toll House work great!

My ravioli press, a pastry bag with filling (keep it in a tall glass when not in use!), and chocolate drop cookies cooling in the background. Ah, yes, a glass of chardonnay as well.
Following this baking extravaganza it was time to make dinner! Inspired by a satirical and hilarious article on deadspin, The Haters Guide to the Williams Sonoma Catalog, I set out on a mission to make a pumpkin parmesan sauce despite the fact that I do not own pumpkin tureens. Sigh. I also wanted to use my new gift from Ross; a ravioli press! And thus the idea for cheese ravioli with pumpkin parmesan sauce was born. We rounded out all those carbs with some sauteed spinach. Unfortunately, I didn't snap a picture of the finished product, but the raviolis really looked great and were tasty too! Also, using a pastry bag with a large tip to fill the raviolis is MUCH easier than portioning out the filling with a spoon. If you don't have a pastry bag and/or large tip you can always put your filling into a ziploc bag and cut off the corner - voila! Instant ravioli filler.

Real-time view of making raviolis. Make sure you have some wax paper on hand to lay them on to dry a bit before cooking.
And that was just Saturday!! Another post on Sunday's kitchen happenings to be added shortly...

Wednesday, October 31, 2012

hurricane productivity

Thanks to Hurricane Sandy, my fiance and I got to spend some quality time at home together, in between the emails and conference calls from our couch! And, I took full advantage of this unexpected free time. Including painting my nails to coordinate with my halloween costume; Katniss Everdeen from The Hunger Games. Unfortunately, due to shipping delays (also thanks, but not really, to Hurricane Sandy) the "Girl on Fire"/second half of my costume is not complete. And thus, I'm sticking with her arena attire. At least my nails are glittery! (Pictures to follow.)
Popovers fresh out of the oven!
Tuesday brought out my inner domestic goddess. I woke up and instantly decided that I was ready to bake. A quick web search resulted in some promising popover recipes! I opted for this recipe which I found on Authentic Suburban Gourmet because it is the traditional Neiman Marcus recipe (which I love - you must try their popovers if you haven't yet!) and it has no butter (yay for cutting down on saturated fats). Please note, you don't have to have a popover pan, you can achieve the same look using a traditional muffin tin, they will just be a little more stout. That's what I did.

And while I expected to follow up the popovers with some oatmeal chocolate chip cookies, I opted to take a few hours break from the kitchen and returned around 5 pm to make a before-dinner snack. Toasts with toppings are by far one of my favorite finger foods! I'm pretty much willing to try any combination of ingredients. Here are some toasts topped with (in no particular order): gruyere cheese, fuji apple slices, fig preserves, and slightly burnt and crispy caramelized onions.
Started a new painting and prematurely grabbed my new koozie with my new initials!
But my favorite at-home activity was putting together some lined envelopes and stamped notecards! I was inspired to do this months ago when I saw Emily's post on Cupcakes and Cashmere. It wasn't until recently, though, that I treated myself to a glue pen (for easy glitter application) and stumbled upon some blank stationery. So, with the three cards and envelopes I found, I went to work using the leftover scrapbook paper originally rationed for my birthday party decorations.

Take an envelope, and cut a piece of paper to fit about half an inch from each edge.
 For the picture above, I used our glass balcony door to help with the see-through effect and lining up the edges. I also folded the "template" in half so that when I cut it, each side would be even. Also - you only need your liner to be a little longer than the bottom of the triangle cut in the envelope.

Use your template and trace the shape on the back of your liner paper.
Once you cut out your liners, slip them into an envelope and see how they look! Also, hold the liner in place with your fingers and close the envelope. This will create a crease right int he liner and help keep it in place while you glue it down. Use a glue stick for adhesive. I found that keeping the liner in the envelope was easiest, fold it at the crease and push it down a little. Add a bit of glue directly on the envelop at the crease and then on the triangle of the liner. Unfold and press into place.

Some tools I used to add a little something special to the cards. The glue pen is new!

So, I need a little stamping practice. But here's the finished look!
I am so happy with how these turned out!! Now I just need a reason to send them... Hmm. Also, let me know if you want any :) Happy to make more for friends.

Tuesday, October 30, 2012

ombre manicure

Ombre is quite trendy right now. From hair to flowers to clothes, this look can be spotted anywhere! I have seen a number of ombre manicures, mostly on Pinterest. There are also a number of different methods people recommend. You can use the brush from your polish bottle to blend the colors together. You can also make each finger a different shade to create an ombre effect, like I did here and here. Or you can use a makeup sponge to dab and blend the colors.

The method I used for this manicure, I found on Pinterest. I had previously tried this method without success but I was determined to give it another try. First, find the colors you want to use for your ombre manicure. These can be different hues or tones of a similar color family. You can also go with a contrast look using black or white with a bold color for a nice pop!


I went with Essie's "My Place or Yours", "Very Cranberry", and "Runway Reality" for a three-tiered fading effect. Start with the lightest color and paint your entire nail in one or two coats - enough to get a good covering. Make sure you let the base color dry. This is very important! (And, the mistake that I made the first-time I used the sponge-applique ombre technique.)

Apply one or two lines of each polish color to the edge of the makeup sponge. Either light to dark, or dark to light - depending on how you want your final ombre effect to look. Make sure you get the polish on the sponge good and heavy because the sponge will soak up some of it. Now - take the sponge and press it down lightly on your nail. Hold for a few seconds. Then dab it a few times on that nail. The dabbing will help fade the colors together more harmoniously. Continue this process for all ten nails and finish with a top coat!

Voila!

Friday, October 26, 2012

The Journey to Flying Out Of Lines: Part 1 of Many

One of my many goals in flying trapeze is flying "Out Of Lines" or "OOL" - this refers to flying without a harness. (Don't worry, Mom, of course there is still a safety net beneath me.) The journey to reaching this milestone is a long one which requires a lot of training, focus, and commitment. It certainly helps to have an amazing group of folks consistently supporting your growth and helping you get back up when you (metaphorically) fall.

The first step towards OOL is acquiring a "Log Book" from my school; Trapeze School New York (TSNY DC). I got my log book almost a year ago! The book teaches students about the equipment and includes a number of forms to track ones accomplishments in the following areas:

  • Flying Trapeze Skills
  • Trampoline Skills
  • Conditioning Requirements
Outside of these three physical areas, there is also a written test about the equipment and requirements on the board. This last part refers to hooking up your fellow students when they are getting ready to fly, serving them the bar, and retrieving the bar and lines while standing on the board. 

This past week I had hoped to complete my conditioning requirements which includes; three pull-ups, 15 push-ups, and two sets of 10 V-ups. Unfortunately I wasn't able to finish my test, as my body started to give out when I was four V-ups short of the requirement. This was a hard reality to swallow because I was SO close and I had done twenty V-ups before. But in the end, it was safety and rationality that prevailed. When my legs were shaking and pulsating uncontrollably as I lifted them off the ground, I knew it was time to rest. Thankfully it won't delay my journey because I have so many other requirements to meet before the day comes when I can fly without lines. 

What are the next steps in my plan? Next week I'll be taking the written test. And the week after I'll be going for the fitness test again!! (Gives me plenty of time to continue working on my V-ups.) 

Wednesday, October 17, 2012

brushes and flowered accents

One of my birthday presents from Ross was a set of nail art brushes! This was such a great gift and something that I likely would not have bought for myself. It was very thoughtful for him to think of something that is so "me". As soon as I opened the set I started doing some online searches for the uses of each brush. My research turned out to be helpful; for example, it seems that fan brushes are typically used to apply glitter or to create a feathered effect. In the coming months as I try out my brushes I'll share new designs and feedback with you all.

First I'd like to direct you to a great video series on nail art brushes. This link is Part 1 of a three-part video series. Not only does Copy That, Copy Cat provide these great tutorials, there are also wonderful designs to inspire your own creations - much like the design you'll see below!

My base color is "Clutch Me If You Can" by Essie and I am literally working with the dregs of my bottle. (Thankfully I'll be making a little stop at my favorite beauty store in New Jersey tomorrow afternoon!) I used a bright metallic silver for the design and a thin brush with just a drop of paint on the end. The video tutorial also taught me to wipe/clean the brush tip every few strokes, which was a very helpful exercise!


Does anybody have suggestions for future nail art designs? I'm so excited to use my new brushes. Just think, my Hunger Games nails would have been A LOT cleaner with a real brush set rather than using the brush that comes in the polish bottle.

PS - HAPPY BIRTHDAY TO ME :)

Sunday, October 14, 2012

return to the bar

My forceout in hands to get more height before catching the return bar.
I caught the return bar! What amazes me is that as I review my video, there are no instructors calling each step. Rather, I am naturally and instinctively moving from segment to segment as a result of my body's aerial awareness and rigorous training. The feeling of my first catch is something I couldn't prepare for. I had been "working a return" for almost two months (not a long time in trapeze!) and all of a sudden, I pushed off the catcher, turned, and there it was, the bar was waiting for me. It was a feeling of surprise, elation, and pride. This is such a big step in a flyer's journey at the rig and it has opened so many new doors for me!


So, what's up next? Now, that I can return to the bar, I will be working on my remount to the board. This entails performing my trick, catching the catcher, returning to the bar, and dropping my feet up onto the board and standing up again! Just like you see in the circus. Another important milestone not too far off is flying out of lines. This means flying without a safety belt - not to worry, the net is always there! There are a number of requirements to fly out of lines including a written test, flying requirements, physical requirements, and trampoline skills. I always expected that the most difficult piece of these requirements and the last piece that I would check-off would be the three unassisted pull-ups. To my surprise, I was able to do three pull-ups last week! Looks like flying out of lines will be coming sooner than I thought!

Thursday, October 11, 2012

Priorities

A few years ago my Dad equated stages of life to writing utensils. Stay with me here, because I think the analogy is really spot on. As a child you can make mistakes without any significant impact, these mistakes are forgivable and forgotten quickly - much like chalk in the rain. As you grow and earn responsibilities, as a pre-teen you're more like a pencil. You can make mistakes, erase them, but a faint trace always remains. In high school your decisions have lasting effects; they can also leave scars. High school is like an erasable pen. (We all know they don't really erase!) Moving on to college, each decision is more important and permanent, and have lasting effects on your personal and professional life. Here, you are in the "pen" phase of life. Last, but not least, the majority of your life is spent as a permanent marker. After college comes all the important decisions; career, life partner, housing, children. At this point in your life personal and professional decisions and mistakes interact with each other; sometimes it's important to take a step back and think about what is most important.
Image courtesy of Chilly Dog Cozy Blog
I had to do this just the other day. As the Round 1 deadline for business school applications looms around the corner (literally... they're due on Tuesday!) I took a step back and thought about what lay ahead. Of course I have to finalize my applications, which involves putting the finishing touches on my essays (seven in total). I also have my first interview at a business school on Monday - which I willing be flying to and from on the same day! Therefore, I must spend the weekend on final preparations. My birthday is next week and Ross and I will be celebrating with a nice dinner on Sunday night. And, to throw a wrench in the works - I had planned to host my birthday party on Saturday night. This entails a lot of prep on Friday night and Saturday day.

This party meant completing all of my application materials by Friday afternoon, four days earlier than necessary. It also meant running the risk of being tired and run down for my interview. This was a risk that I was not willing to take. And so I cancelled my birthday party, for the first time in my life I will not be having a birthday party. Kind of bummer when you think about it that way. It was not a decision that I wanted to make but one that I had to make. Being an adult means making the right decisions and prioritizing items in your life. I guess my homemade Happy Birthday pennants/bunting will have to wait for next year. C'est la vie.

Have you ever been in a situation when you had to decide between what you wanted to do and what you knew you should do?

Wednesday, October 10, 2012

fashion forward for fall

The welcomed change in weather has brought a few of my favorite pieces out from the depths of my closet! I enjoy any change in the seasons because there are always a lot of new ideas for outfits, new accessories to play with, and new shoes to wear! I've lately taken a liking to #OOTD on Instagram. At some point in the day I'll snap a picture of my outfit, usually not my entire body, and share it through the Instagram app. For those of you who may not be on instagram or a "savvy social media user", OOTD stands for Outfit Of The Day. The hashtag (#) is used to hyperlink the acronym. Here are a few recent shots...

I used the PicFrame app to organize the pictures in this layout. My outfit includes Burberry skirt, Diane Von Furstenberg wrap top, the ring I inherited from my grandmother, and the necklace was a gift from my Mom!


This outfit was inspired by a recent Banana Republic mailing. I really enjoyed it! It was perfect for the early Fall weather because these fabrics are heavier but the short sleeves and skirt meant that I wasn't going to to get too hot. The sweater is Elie Tahari, the belt is off of a Theory dress, and the skirt is from Banana Republic.

I wore this outfit wedding dress shopping in New York City! It was very comfortable for a busy day of walking between salons and it was just warm enough for the nice weather! (Lucky wanted in on the picture.) Here, I am wearing a beige silk Theory blouse, black Tahari "peggings" (what I refer to as a combination of pants and leggings. These are spandex material but have a fly and pockets!), and Tory Burch flats and purse.


These fun new tights were inspired by the laces of ballerina shoes. And, I love fall because it means that I can wear my suede Jimmy Choos again!


On a recent rainy day I wore my colorful Burberry rain boots with my chocolate brown Tory Burch dress and my fun printed Michael Simon coat on top.

What are your favorite outfits to wear at the start of Fall? Or any season!